SpyFighter - Let’s unveil the dusty secrets of this old rogue and use an under utilized feature of x64dbg - Graph View- to do it.
Today, for educational purposes, I share my notes from the dissection of the registration routine.
Virus Total Results

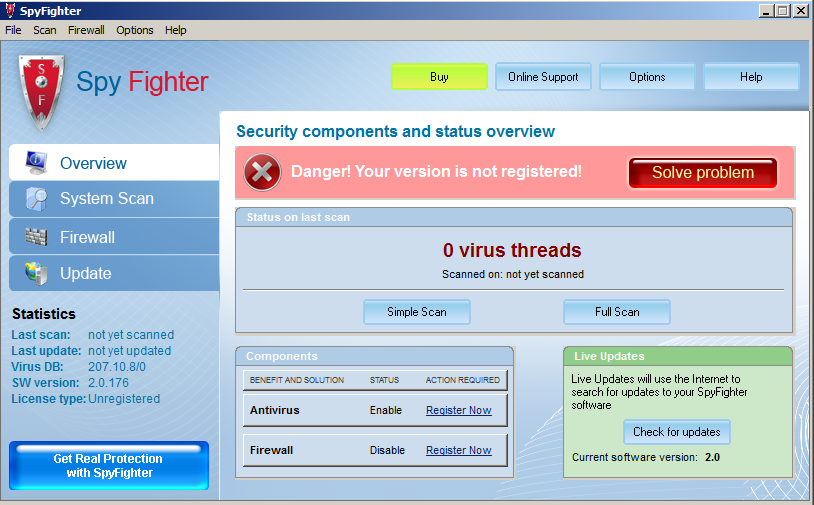
First Run
Finding the Routine
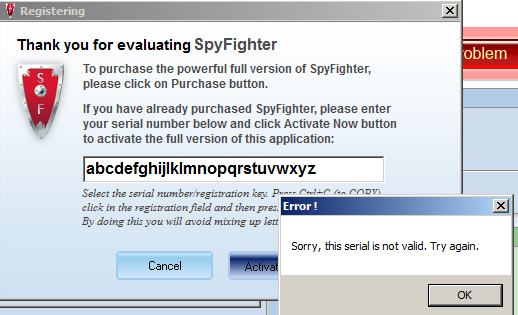
We search for strings in x64dbg. Specifically the word ‘Sorry’ from the error message.
x64dbg -> Right Click -> Search all Modules -> String References

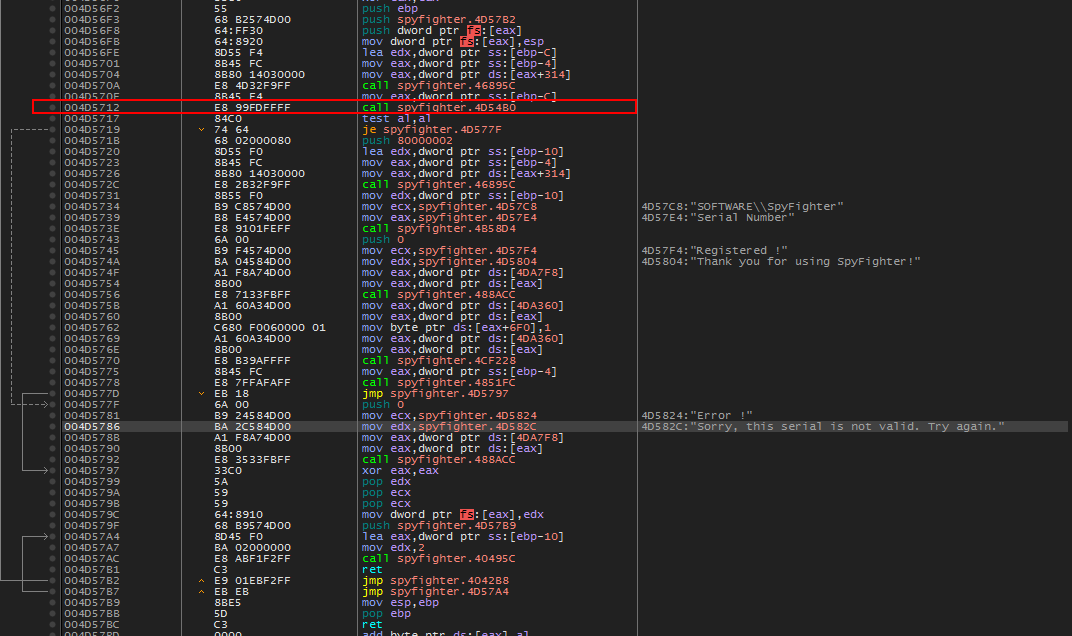
Right clicking and following in disassembly leads us here. The image below shows our ‘Sorry..’ message and a bit above that is the ‘Thank you..’ message that we would like to receive. Just above that is a classic call before a je instruction. Let’s set a break on this call, run(f9), and submit the serial once more. After we break we will step into (f7) the call.
 Step into this Call
Checking if AlphaNumeric
Now we are presented with a loop that continuously calls 0x004D5474.
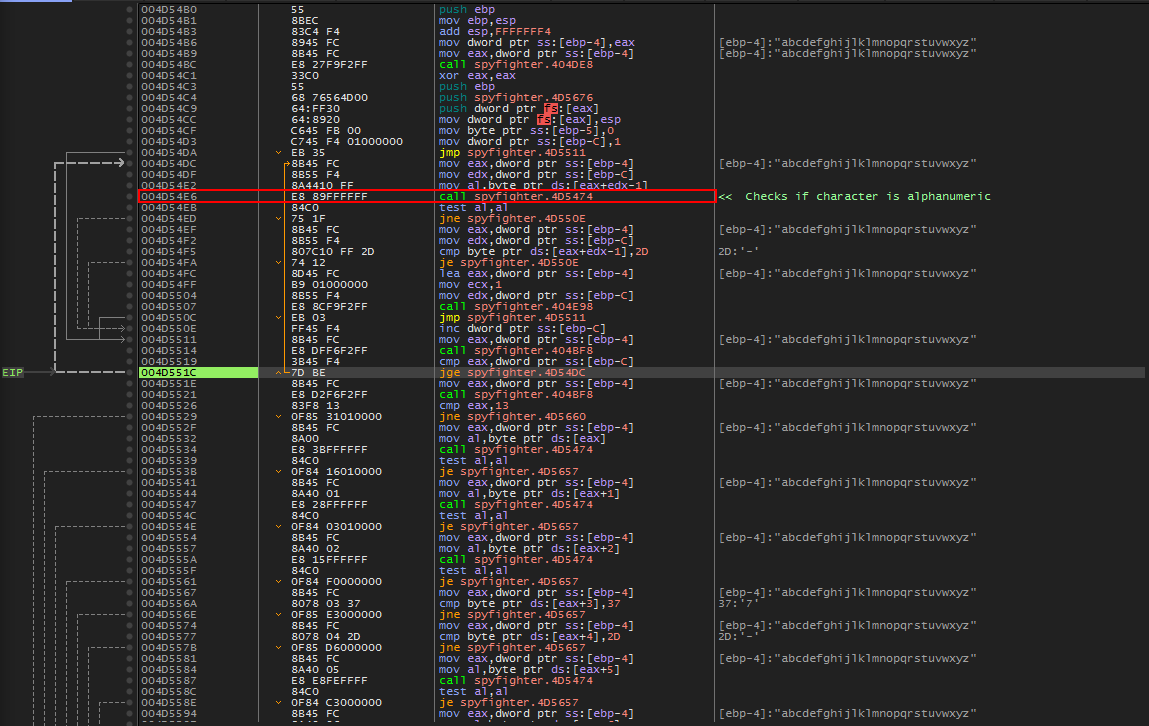
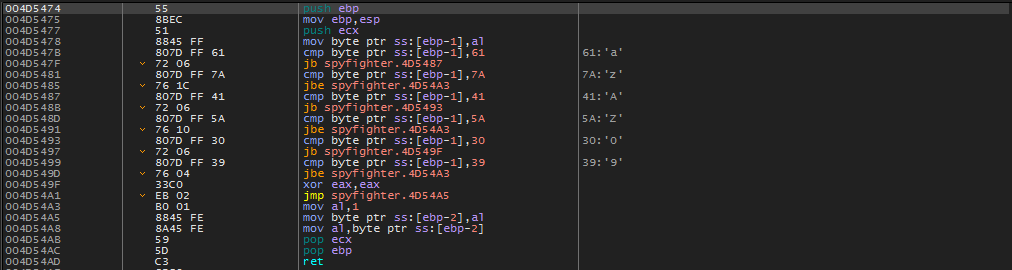
Taking a peak inside this call (below), we can see that this call is verifying that the serial characters are alphanumeric.
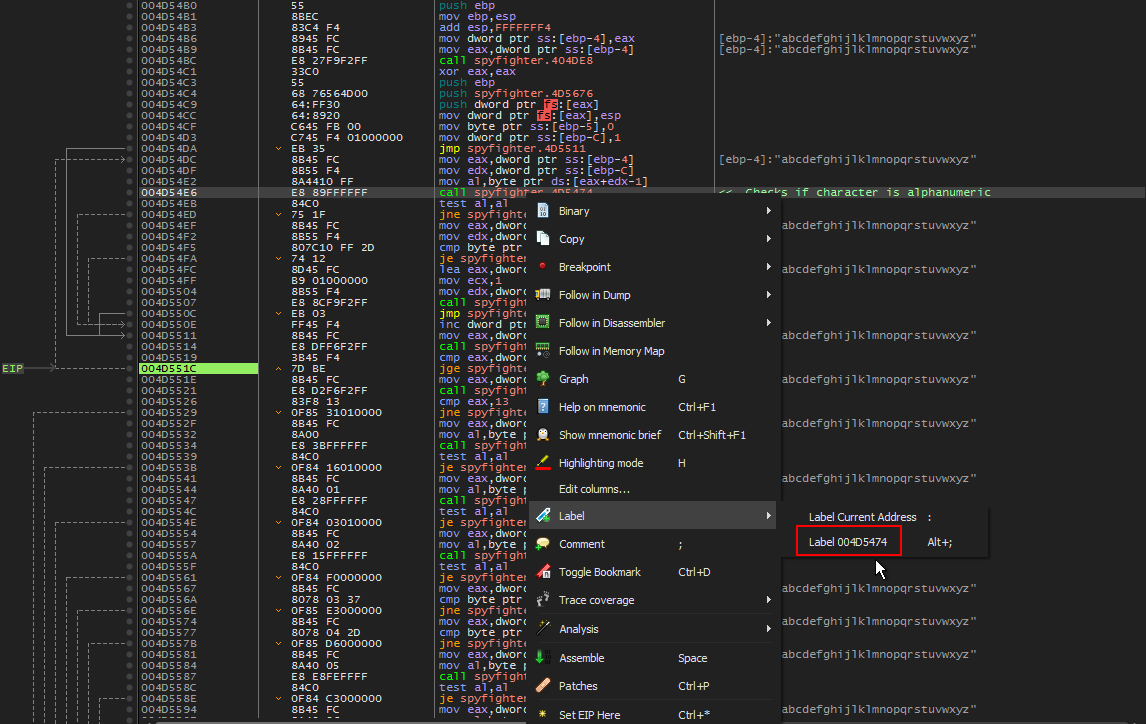
Let’s label this subroutine so we can more easily see when it is being called. We do this by right clicking and choosing ‘Label’.
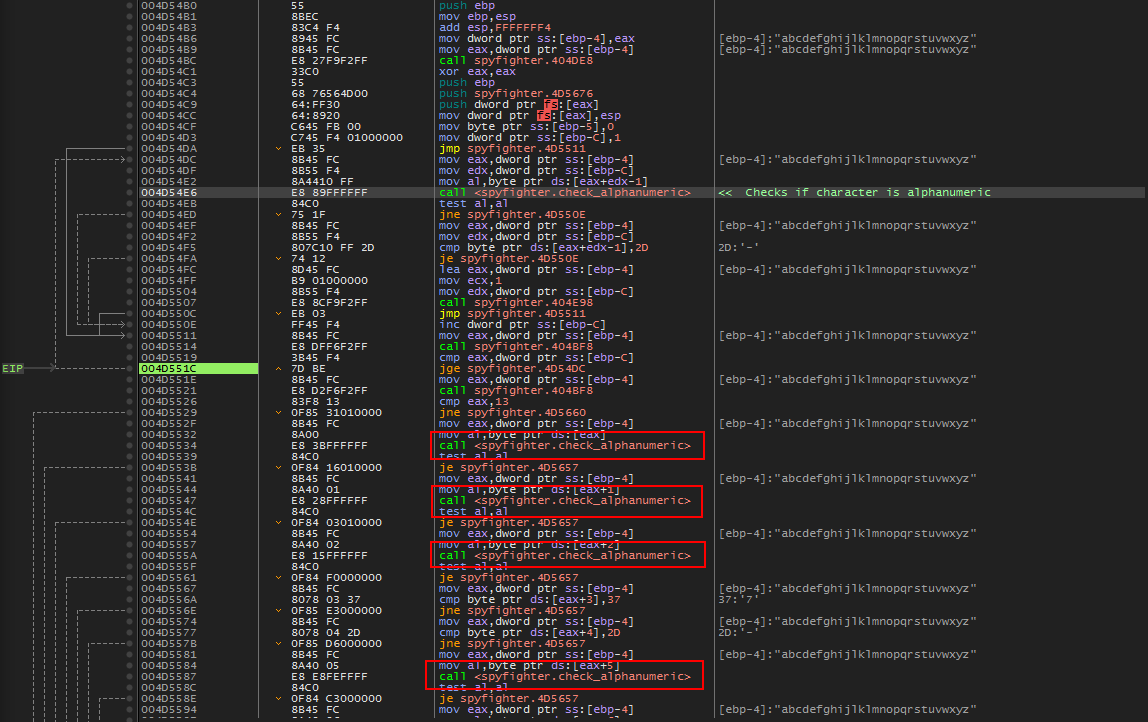
After labeling the routine, we can easily see it is called many more times below.
Checking Serial Length
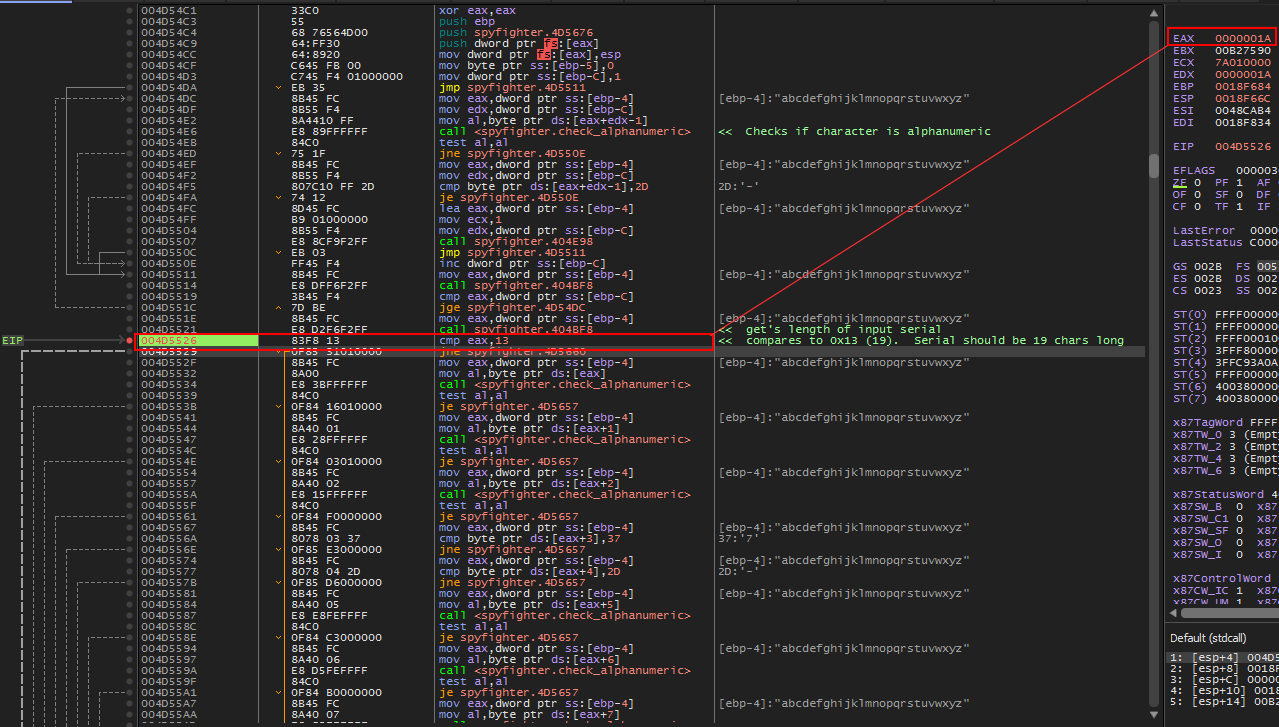
As we continue past the ‘check_alphanumeric’ loop, we arrive here to a call and then cmp, 13 instruction. Upon return from this call we notice that EAX holds the length of our input serial. This value is compared with 0x13 and a jump is taken if they are not equal. In other words, our serial length probably needs to be 0x13 (19) characters in length. Let’s change the length of our serial and run again.
Using Graph View
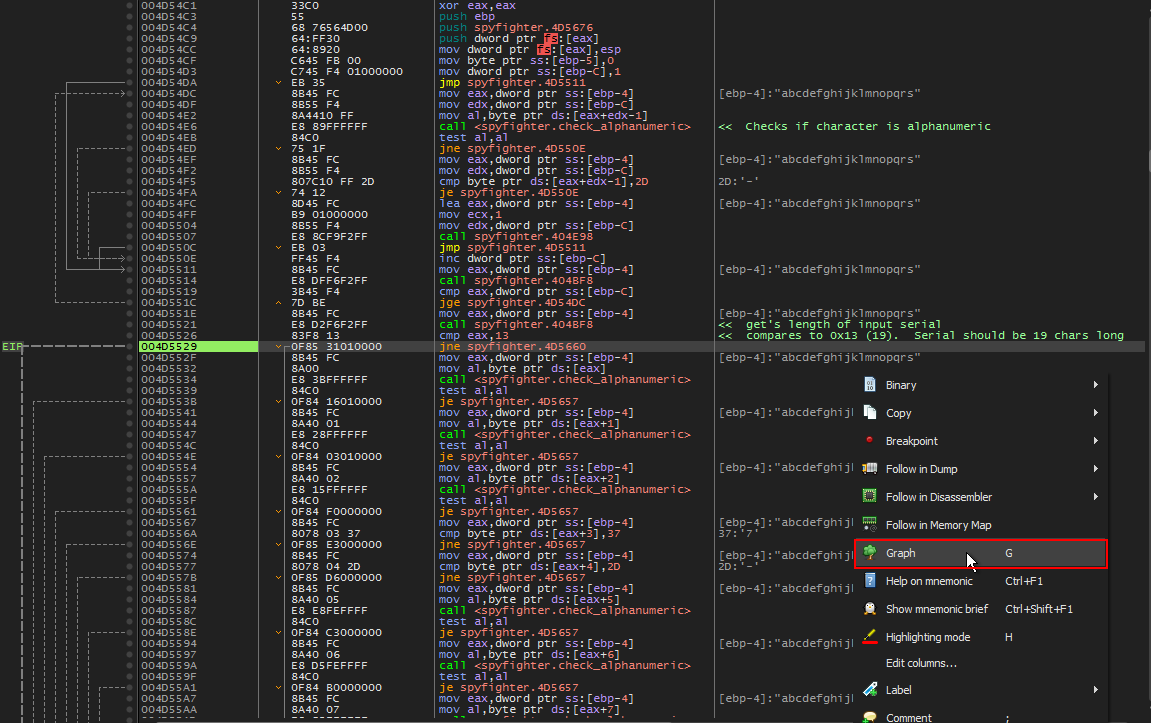
We successfully pass the length check and are now in the midst of more ‘alphanumeric’ calls. ‘Graph View’ feature of x64dbg may help use visualize what is happening here with more ease. Let’s right click and choose ‘Graph’ (see below).
The character checks
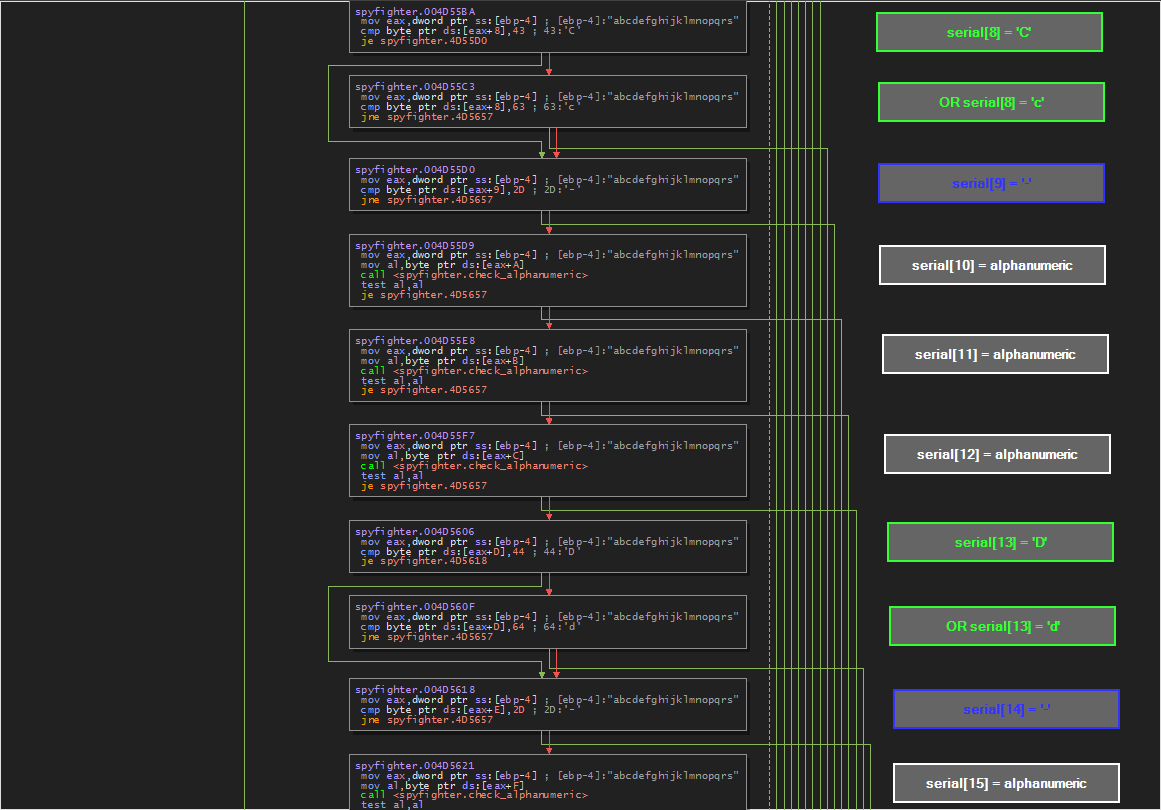
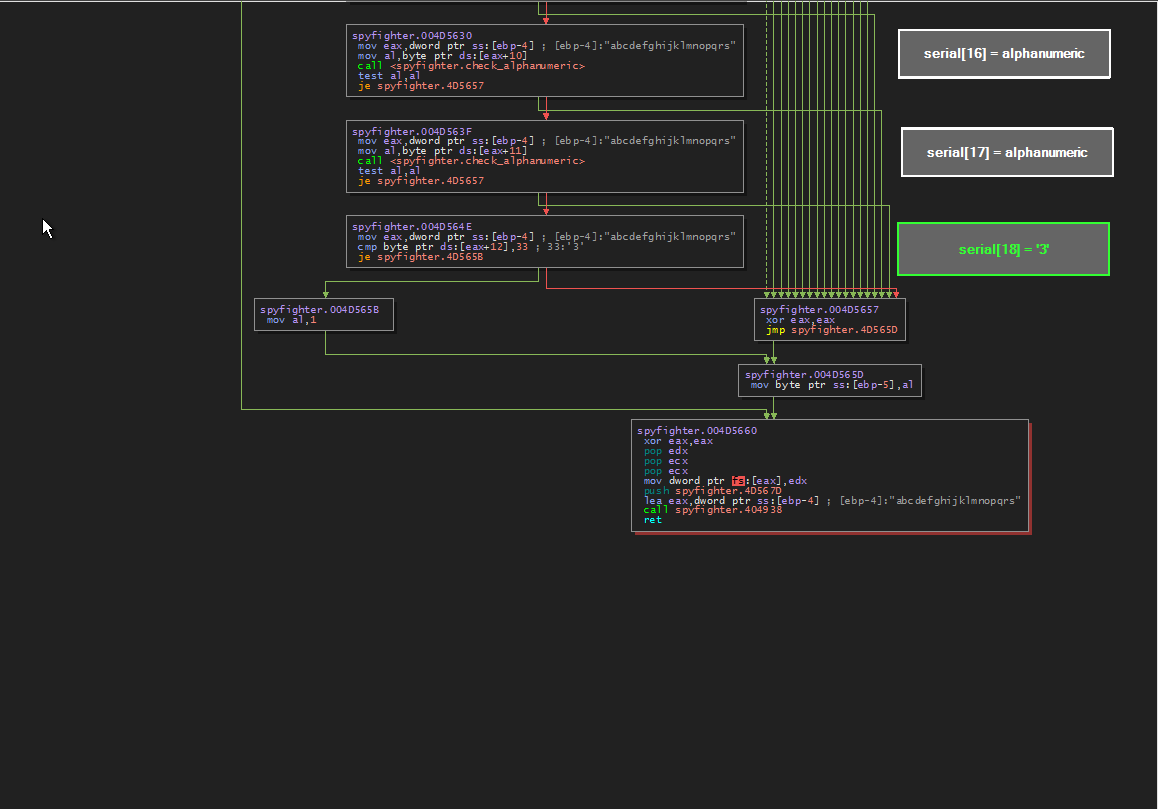
In graph view we can see our input serial as well as some instruction blocks. Our serial is loaded into eax and then instructions are run on one char at a time. For the most part each block represents an instruction for each char of our serial. To the right of each block, I have labeled what is occurring. Graph View has made this super easy to see.
Some chars are just checked to make sure they are alphanumeric, some chars (every 5th char to be exact) are checked to make sure they are dashes (‘-‘)
4th char must be ‘7’
9th char must be ‘C’ or ‘c’
14th char must be ‘D’ or ‘d’
19th char must be ‘3’

Writing a Keygen
With the information above, it is trivial to write a keygen. Let’s knock it out.
1
2
3
4
5
6
7
8
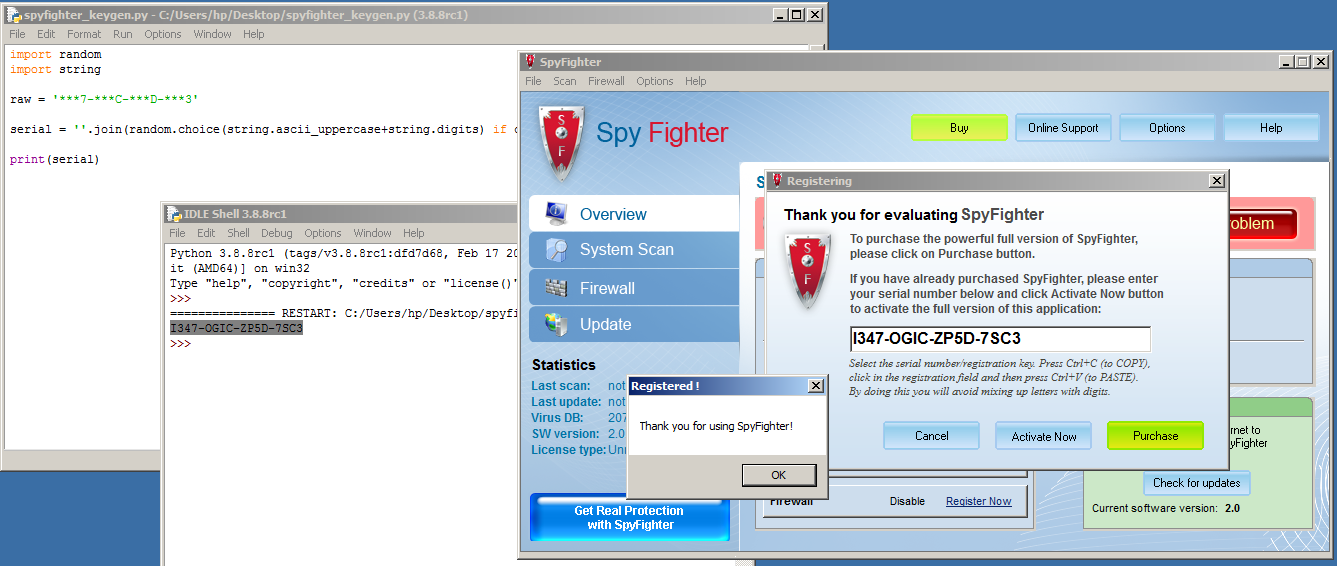
import random
import string
raw = '***7-***C-***D-***3'
serial = ''.join(random.choice(string.ascii_uppercase+string.digits) if char == '*' else char for char in raw)
print(serial)
Testing Keygen